Friday, July 5, 2013

Lamp Redux

       
After                                                                                  Before
I had this lamp in my bedroom, but when I decided to be an adult and get two bedside tables, I got matching lamps for them and moved this out to the living room. It originally had a silver base but that didn't go so I spray painted it with the same black matte spray paint that I used for my mason jars.

I wasn't sure what to do with the lampshade - the blue really didn't fit with my decor, but I had no ideas for how to update it.  That is until I saw this fluer-de-lis printed burlap fabric at Joanne Fabrics. I wasn't looking for fabric for the lamp at the time, but when I saw this burlap I immediately knew I needed to find a way to incorporate it into my home.

Here's how I did it:

Step 1: Tape off where the light bulb goes and the cord so you don't spray them.  I used a plastic bag to wrap the cord instead of wrapping the whole thing in tape.

Step 2: Spray paint the base.  I actually didn't sand or prime the base because I knew I wasn't going to be touching it much, and the matte spray feels like it sticks pretty well.


Step 3: Make a template. I used parchment paper and rolled the lampshade across the table to trace the shade to make a template for the fabric. I traced the bottom and the top - note: a rectangular piece of fabric wont work because of the curve in the shade.


Step 4: Pin the template to the fabric.  I initially pinned it to the wrong side of the fabric, but then realized that I couldn't easily align the pattern that way.  So I pinned it to the right side (with the printing).  This is where having a transparent template really pays off because you can easily align the template on the pattern.

Step 4.5: (not pictured) Realize that because your fabric has a large pattern that can only go one way, cutting the whole template in on piece will end up with a really weird looking lamp.  Decide to do three panels.


Pin the template to the fabric

Align the template so the pattern looks good
Step 5: Cut the fabric around the template.  Note: you will want to leave room for errors.  I cut the template out about an inch bigger on each side and then cut the fabric out bigger than that.  I'd say I probably had about 2 extra inches, but in some places that was barely enough because of the way the pattern fell.


Step 6: Place the fabric on the shade to ensure it lines up well.  I pinned the fabric to the shade so that I could play with it until I got it to look the way I wanted.

I tried to make the pattern match up between
the panels as much as possible


Step 7: Glue fabric to shade. I used hot glue (be careful: it's hot!!) and used folded up parchment paper (because it wouldn't stick to the glue) to press the fabric to the shade. I glued at the top and bottom, just folding the fabric over and gluing along the inside of the shade.


Finished!
Step 8: Finishing touches.  Even after playing with the fabric for (not even kidding) hours, I still didn't love the way the pattern matched up between the panels.  So, I decided to glue jute twine along the edges to sort of buffer against any misalignment.  (Bonus: if you do something like this, you don't have to be as careful when gluing the edges together.)  Since I was going to have the twine accent running up and down the shade, I also decided to put it along the top and bottom.  I doubled the thread over to make it cover more area and be more noticeable.

**I made an extra lamp (it's actually the one pictured) and it is for sale on Etsy, check it out!**

Wednesday, July 3, 2013

Animal Bookends, Oh My!


I got this idea from (where else?) pinterest. It was a take on a Pottery Barn Teen set of bookends. The pin shows what I believe to be the PBT version. This is mine!


Notes:
1) I got the Elephants from the $1 section of Target 
    about 6 months ago (they were deceptively 
    $3/each)


2) I spraypainted them with Valspar Metallic Silver 
    Paint (available here)


3) I had a really hard time finding a block that I liked 
    the size of in reference to the elephants.  I ended 
    up wrapping a foam block from Michael's in a 
    heavy paper and spray painting that with a matte 
    black spraypaint.  You can see in the pictures that 
    didn't turn out p-e-r-f-e-c-t-l-y, but you can't really 
    notice the difference that the glue on the corners 
    makes unless you're really looking at it.


Related Notes (similar projects):
1) I made a set of these, using small elephants painted in gold metallic and small boxes with lids that I 
    painted black.  I just glued the elephants onto the boxes and gave them to my mother for Christmas.  
    Though she just put them on a side table right next to the couch, she said she liked them, and they do 
    look really good there.  I think I spent less than $5 on that project (yes, I got her something else).

2) I made a set of these for my brother using dinosaurs and painting them green and putting them on 
    little wooden plaques I found at Michael's, which I painted gold.  He did not like them, and wasn't 
    particularly shy about telling me so. (in his defense... they did turn out kind of crappy, I wouldn't use 
    a green gloss spray paint for the animals, it was too dark to pick out the details.)
Here they are on my mantle, above the TV.

3) I cut a lion in half (inspiration), painted it matte black, 
    glued them to a gold plaque and then glued the plaque to  
    those plastic picture frames that the pin suggests. But those 
    kinda suck because they're too flimsy, if I did it again I'd 
    spring for real metal bookends.  

       3b) Another note: cutting the plastic animal was pretty 
             difficult, even using a really good serrated            
             knife, I messed it up and had to glue part of it back 
             together - be careful with that.  

       3c) Another thing to watch out for is the placement of the
             animal halves - I tried to get them even, but they
             didn't line up the way I wanted because the lion's feet
            were too far down.

Secret Ingredient: Twine Pt. 2

Before
When I get a new craft idea, I usually end up buying a ton of crap that I don't end up needing so it sits around in my craft closet until I get sick of looking at it ...ehhehemm... I mean, until creative genius sparks.

So, after I finished my table, I still had a bunch of twine left over. I wasn't sure what to do with it for awhile, but then I got this awesome idea to wrap a picture frame in it. Well, it turns out it wasn't exactly the best idea... (after the jump).


After

After I finished my picture frame, I was so amped on twine that I decided to make a whole bunch more things! [I didn't mention that I ran out of twine 3/4 of the way through, left the frame sitting uncompleted for about 6 months, then wanted to just paint it, but taking the twine off was too labor intensive, so I put it back and let it sit for about another 6 months until I got sick of looking at it and went and bought some more twine and finished the project in about 20 minutes]


Close Up
I'm not even going to put instructions for these. If you can't figure it out then you probably shouldn't be using a hot glue gun... which, coincidentally is what I used to glue the twine to these pieces. All of which I bought at my local Goodwill! Reduce! Reuse! Recycle! [my interpretation: re-do boring and ugly things so that the world is just that much more aesthetically pleasing!]


Pro Tip: Nail Polish remover gets permanent marker off glass and the like really well.

Super Pro Tip: Pam Cooking Spray, when sprayed and left on sticker residue will help it wash right off!

Here's what I came up with:  

Before (boring and dirty)
After (clean and interesting!)


Shameless Self-Promotion: These glass items are available at my Etsy Shop.

Tuesday, July 2, 2013

Secret Ingredient: Twine


I saw this Ikea Lack table covered in twine sisal over on IkeaHackers, and I was instantly in love.  A) it looks super sweet and B) I already had one of those tables.  Having pawned off it's POS coffee table mate on my parents, I just had this random black table.  Boooorrriiinnngggg.

So, I filed this idea away in the ole memory bank, bought some jute (which is smaller, and now that I'm looking at this picture again I realize why mine took forever and a year to finish ... no really.), and promptly set about not getting started until late one night when I didn't want to go out.

Anyway, here's my version.  It now holds my super sweet printer scanner.


I modified the original directions because there was no way in tarnation that I was going to glue all the twine down.  So I just glued it at the top and then I spread some glue over the twine every so often as I wrapped.

Notes:
1. I took the legs off to wrap them, so I could just twirl them around.

2. I wore latex gloves so I could smear glue under the twine as I went.  I pretty much just squeezed some glue onto newspaper and dipped my finger in every so often.


3. I couldn't figure out how to make the top square without actually gluing every strand (and, I repeat, there was no way in tarnation I was going to do that). So, I used some carpet tacks (tiny little nails - these are what you get when you go to home depot looking for upholstery tacks (another story)).


4. I basically held the tacks over the table using a pliers to hold them in place, then I hammered them in just a bit, then I wrapped the string around them and then hammered them in all the way.  You can get away with doing a few tacks at a time, you just have to do them from all sides.

5. this literally took forever and a year.  I ran out of twine when I was halfway through the top and really didn't want to deal with those stupid little tacks anymore, so I just put a placemat on top of it and no one was the wiser.  .... But then I did, eventually finish it.


Detail of the top

Sunday, June 9, 2013

Warning: Explicit Content - Mason Jars

Everyone is obsessed with mason jars lately.  Mostly I think the ideas are cute but - since I'm not planning a wedding any time soon - irrelevant.  I have to admit, I did jump on the bandwagon when I saw a mason jar which was spray painted with words embossed on the side (see: http://bit.ly/11OUBcg).  I instantly loved these but I really am not the type to have the word 'love' spelled out anywhere I live... that's about as likely as me throwing a tupperware party.

Cheeky Mason Jars

I gathered my supplies: three mason jars (I have no idea where three came from, that's just how many I bought), some puffy paint, and black matte spray paint.  I was all ready to go!  But then I couldn't settle on what to put on the jars.  Sure, they only cost a dollar or two, but I didn't want to mess them up.

At first I thought I would just put some symbols - I really like the ampersand (&). So I was thinking: # & @.  Unfortunately for me, I cannot draw at.all. so those simple symbols turned out to be overly ambitious.  So I put the project away and didn't come back to it for months.

By the time I got back around to this project, I was back in school for the semester and not too happy about it.  I'm not really a school person, and I'm pretty sure (judging from their content) that it was getting close to #finalz time, so I was extra angsty.  And I must have been listening to a lot of Drake and Rihanna.

I settled on: f*** that noise, &, and #yolo.  The first is a lyric in a Rihanna song that I've always loved, to me it just says: "f*** the small and insignificant stuff" and/or "f*** what other people say."  People that know me think these are very fitting.  I love that they're explicit, but the black matte paint doesn't draw attention to them.  I also tried to soften the blow of the expletive by writing it in cursive.

Process: I drew on the jars with a marker that rubbed off until I got something I liked, then I went over it with puffy paint, then when that dried I spray painted it.
Mason Jars on my desk.  The black matte makes it hard to read what they say unless you're up close.

#mindblown - You Can Shop Online at Dollar Tree

First off, let me just say, I love the Dollar store.  Like, probably more than Macklemore loves thrift stores.  If it weren't for my complete lack of singing ability or training I would totally write a song about it.  I think the chorus would be something like: "Dollar Tree, thaz my jam" and it'd be set to the beat of "F**kin' Problems."

Getttting back to reality, I will pretty much use any excuse to go there and I always spend at least a half hour just browsing the aisles.  Sure, I inevitably spend $20 on things that I don't really need and will probably break, but there are some really great things there too.  In all honesty, I know I've bought a lot of stuff there over the past two years (I wasn't ever close to a Dollar Tree before), but I'm not sure what.

I love their glassware, I think my first project from the dollar store was when I filled a few of their square candle holder glasses with their decorating rocks and a small candle and those are now the decoration on my counter.  I also use some of their cleaning supplies, their version of the magic eraser is probably the cleaning supply I use the most out of all the ones I have.  It's great for getting stains off the counter and scuff marks off the walls.

OK, so now that I've gotten that out of the way, the real reason I'm writing:

You can buy things online at the Dollar Tree and have them shipped for free to your local store and pick them up!  I saw a sign about it when I was in the store browsing for crafting stuff (I think I went in to buy some of their candlestick holders to make tiered pedestals out of) and just had to look into it.

Most of the things you have to buy a bunch of, but they're still just a dollar.  So you're still spending like $12 for 12 candlesticks!  This might not make sense for everyone or every item (what would you do with 36 boxes of ziplock bags? or 36 travel mugs?) but if you need a bunch, why not just buy it online?

Online they have some really cute picture frames, and if you wanted to do a gallery wall, these would be perfect!  Plus, you'd know you were getting 24 of the exact same frame.  Here are a few of the ones I really like:

Silver Beaded 4x6 frame: http://bit.ly/102ue8w (this is $3/frame, min order: 6)
Silver Plastic Beveled 5x7 frame: http://bit.ly/ZCPm35 ($1, min order: 24)
Matted Triple Bevel 4x6 frame: http://bit.ly/19diPWE ($1, min order 24)

Also, they have some really cool craft ideas that show you what to use from their stores:
cupcake pedestals project: http://bit.ly/18Y8efr
tiered stand project: http://bit.ly/18Y8fjG

[oh, and no, I am not in any way affiliated with the Dollar Tree!]

Sunday, June 2, 2013

String Art

A few months ago I invited some friends over for a 'crafting brunch.' We'd been discussing it for a long time so I decided to make it happen.  We all chose different crafts to do, and brought our own supplies. It was a nice break from law school and we all walked away with something fun.

Closeups of my string art and a visual of the wall they're displayed on.

I settled on a string art project I'd seen on Pinterest (http://bit.ly/102wYTD).  I'm a huge fan of boats and I love the simple lines on these, but I thought I should start out with a little less ambitious of a ship design than in the tutorial.

All I needed was a canvas, some string and some glue (note: hot glue probably wouldn't be good for this because it dries so quickly and you might need to move some things around as you're working).

I ended up using two canvases I already had from when I moved into my apartment.  My mother always paints the walls in our houses 'musiln white,' which is really just pale yellow, so I'm not used to staring at white walls and I guess I was a bit overwhelmed by all the blank wall space (I was used to living in a tiny studio in NYC, so moving into a (GASP!) one-bedroom in Durham was a huge change).  I was so desperate to get things on the walls to break up all the white that I picked up these awful flower paintings at the local Goodwill and put them up until I could find something better.

The point is, I had these two matching canvases sitting around (because I did find something better). I was going to take them back to the Goodwill they came from, but I thought that not only would using them for this project be economical, but I'd really be doing the world a favor by getting rid of two tacky paintings.

Before: Tacky Flower Canvases

I pretty much followed the tutorial at the link above, except I used a cream colored yarn instead of string.  The hardest part was finding simple enough pictures to use as a template.  I ended up googling children's coloring book drawings because I figured those would have simple lines.  It still took awhile but I'm really happy with the finished products. 

I really want to make some more, but I'm already running out of space to put things and these are so simple I could see my apartment becoming overwhelmed by string art!  Maybe when I finish all the projects I've got in progress now I'll make some to give to friends or sell.

Sunday, May 26, 2013

The Miracle of Modge Podge

Of course, anyone who's spent about 5 minutes on pinterest (or gone to preschool) knows that Modge Podge can be put to all sorts of crafty uses.  But people are still always surprised when I say I used the stuff to make or improve something.  Though my experiments haven't always turned out exactly as I wanted, I usually end up loving my creations anyway.  Here, I show five different Modge Podge projects I've made over the years. (Instructions from memory are included).
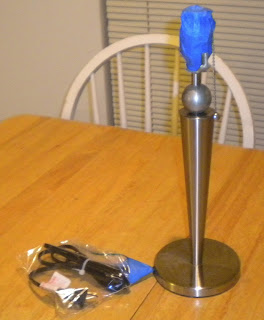
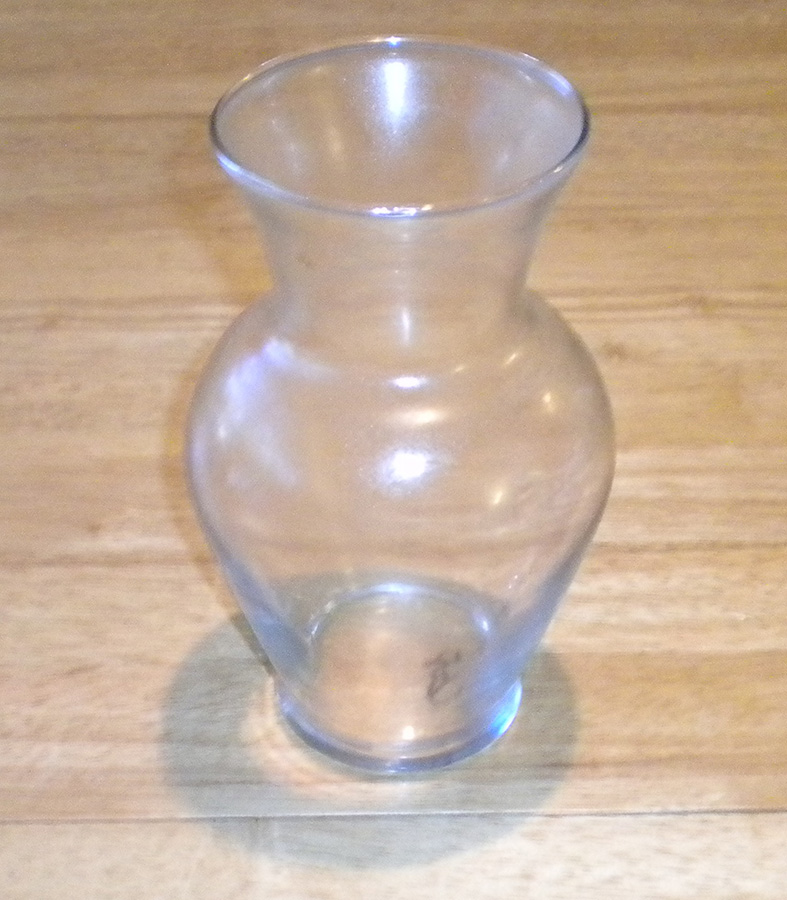
1. Modge Podge Vase


The paper I used for this is actually from the bag someone gave my parents wine in.  I held on to the bag for awhile trying to find a use for it.  When I acquired two of these clear vases, I decided to cover one of them in the paper.  All I did was sand the vase, cut the paper to size, paint glue all over the vase and back of the paper, affix the paper to the vase and then paint the outside with glue.  I did a few coats on the outside and then I flattened the excess paper on the bottom to the base and glued that there.  (Note: I remember having some trouble getting the paper to stick initially, especially where the two sides meet.  I believe I used some rubber bands to hold the paper in place until it stuck all around after a few coats of glue on the outside.)

 Detail of bottom.


2. Modge Podge Shoes


A friend gave me these Aldo heels (originally a dark nude) because they were too small for her.  I wore them until I really couldn't anymore (the leather cracked at the toe and was practically gone on the heels) but couldn't bear to throw them away.  They sat in my closet until a friend sent me a link for painting the heels of your heels with glitter to glam them up or disguise wear and tear.  I thought, "Hey, if it's good enough for the heel, why not try the whole shoe!" and set to work.

Instructions:
1. use a pair of sturdy heels (I suggest those heels you loved so much you wore them out.  You can always go get the plastic tip replaced if that has worn off).
I tried to capture the detail here.
There is a very subtle sparkle and up close
the texture is a bit rough, but I really
like the way they turned out.


2. clean them.  I used nail polish remover because the heels were patent and I wanted to get rid of some of the coating.  After that I sanded them a little but this is optional.

3.  tape off the heel and insides. I used painters tape and just folded it in at the edges to get clean lines.


4. mix some glitter and modge podge.  I really just eyeballed this, but I used a lot of glitter so the modge podge was all black.  You don't want to mix a huge batch of this at once because it will harden, it's better to have to remix in the middle of one coat than to have any left over.  (Note: the glitter I used (from Jo-Anne Fabric) was really small.  I kind of like the way that the glitter is not very noticeable on these but if you wanted them to be more glittery, you should use bigger glitter.)


Artsy picture of me wearing the heels.                    

5. paint the heels. a lot.  Seriously, I have no idea how many coats this took, but it was a lot.  I waited an hour or two between coats so that it would dry and the process was slow.  Each coat adds more glitter until the whole shoe is covered.  If there are any spots that look thin, just dab those areas with some more mixture.  I used a regular paint brush for this (the cheap kind) and a detail brush at the end.

6. let dry.  you're going to want to let these 'cure' for awhile before you wear them.  I wore mine pretty soon after and it was rainy and I had to retouch them after (nothing major though, I just wanted them to look perfect).  But, that's the beauty of these shoes: ou can scuff them all you want and you can just add some more glitter and they're good as new!


Note on water resistance: As I said, I had some trouble with these in the rain initially but I didn't after that.  If you wanted them to be waterproof you could give them a clear protective coat.  I'm not sure what you'd use, but keep in mind that you might have trouble re-touching them afterwards.


3. Modge Podge Tray


This is a tray I picked up at Goodwill (it originally had a tomato or something on it).  I painted it this grey color (Martha Stewart Paint) and then glued this pretty card stock I found at Jo-Anne Fabrics to the bottom.  I used a pretty thick modge podge/water solution (just enough water to make thin the glue a little bit) and applied it to the bottom and top of the paper, painting over the paper a few times to give it a protective coat.  I think I used the matte kind of Modge Podge here because I didn't want it to come out too shiny.

I love the way it looks, and it's the perfect size to hold my remotes on my coffee table!


4. Modge Podge Shelves

This was a really simple project.  I had these shelves, which were originally espresso (as was all of my old furniture (I'm so sick of that color)), and I covered them in paper using the same method as above.  I will try to upload better picture of these, they're real conversation pieces.
I use these shelves to hold pictures and 
other knick-knacks I want to display.

I got this idea from a store display in South Korea, so I started collecting foreign newsprint to cover a shelf when I got home.  The bottom set of shelves is covered in South Korean, Vietnamese, Chinese, and Japanese newsprint.  I didn't have quite enough paper to cover the whole thing so I ended up using the finance section of the NYT to fill in the gaps.  I also added some paper money from my travels (ssshhh, don't tell, you aren't supposed to take any Yuans out of China), these amount to like 50cents, and I was previously using them as bookmarks.

Personal Note: One thing I did when I was hostel hopping in Asia was to leave whatever small amount of paper money I had left at the end of my trip in a book and leave it in the library at the hostel.  Usually hostels have books you pick up and leave at whatever hostel you're at when you finish.  I thought this was a nice thing to do, so whoever got the book next would have a nice surprise.

5. Modge Podge Poster

This poster is shown in the 
above picture as well.

I bought this poster of a baby elephant (so cute!) on Amazon for like a dollar.  I loved it but didn't think it would look good in a frame and since I think I'm too old to have plain posters on the wall, I decided to glue it to a canvas.  This is a remarkably simple way to sort of 'civilize' a poster.  You literally just mix some modge podge with water, paint the canvas with it, paint the back of the poster with it, put the poster on the canvas (carefully lining up the edges), and then paint the mixture on top a few times (I probably put on 4 or 5).

The trickiest thing is getting rid of all the air bubbles.  What I did was use a flat edge (a ruler or something) to push the bubbles from the center to the edge.  I did this a lot at first and then less with each successive coat.  Keep in mind that the air bubbles will go away when it dries - but not if they are too big.

I should note that because the mixture is wet, it can make your paper tear.  That happened on this poster when I was trying to get the air bubbles out.  I ended up liking the finished product because it makes it look a bit aged and less like I glued a poster to a canvas, but if you're worried about that you might want to find another way to do this (perhaps spray adhesive).

6. Modge Podge Map Quote


On my bedroom wall.

When I taught English in Japan I made it a point to travel as much as I could and I tried to save all my city maps.  This is a map of Kyoto (my absolute favorite place I went in Japan) that I modge podged to a canvas using the same process as above.  I originally cut out some pictures from brochures of places I loved and put those where they were located on the map but hated the way it looked.  Then the canvas sat in my laundry room for a year or so until I decided to do something with it.  At that point I added the pages of a map I'd saved from the old Fodors guide I found at my school.

This quote is from (of all places) a Wiz Khalifa tweet at the end of 2012 (when I started using twitter again).  I instantly loved it, wrote it down in a few places and tried to figure out what to do with it.  Finally one night when I decided to come home from a pre-game instead of heading to the bar with everyone else (read: I was tipsy), I decided it should go on this map, in cursive.

So, I put on some music, got out some graph paper (not immediately, I remembered I had this after I tried to make my own, after I'd spent awhile writing this out), cut it to the size of the canvas and decided how I wanted the letters.  Then I blocked off where each letter should go (based on the dimensions, each letter was supposed to be like 2 inches high and 1 inch wide.  This varied a bit but I tried to stick to it) and got to work writing it out in large cursive.  This took a.w.h.i.l.e. but it's ok because I had good music and some beer in the fridge.  After I liked the way it looked on the graph paper, I traced it onto parchment paper (b/c that's what I had and it's kind of translucent).

The next day I bought some charcoal paper, secured it over the canvas, secured my parchment paper over that, traced over the parchment (which transfers some of the charcoal to the canvas.  Note: this resulted in a very light outline), and then painted over the outline.  I used some oil based black paint I'd bought for something else awhile ago and an eyeshadow brush I never liked very much (because that's what I had and I'm resourceful like that).  I cleaned up the paint with a Q-Tip and let it dry.

7. Modge Podge Propaganda Poster


This was my first experience with modge podge.  I save it for last because, though I love the final result, it wasn't supposed to look like this.  I bought a reproduced propaganda poster in Vietnam and wanted to display it on an aged canvas.

To 'age' the canvas, I brewed some really strong tea (a bunch of bags, not much water) and painted that on the canvas a few times until I got the color I wanted.  Then I used the above process to put glue the poster to the frame.  This is where I got in trouble.  The paper was especially porous and the water/modge podge mixture made all the colors run (it was originally a very vivid picture).  To salvage the poster as best I could (because going back to Vietnam wasn't really an option), I blotted up the ink on the poster with a paper towel, paying special attention to where the edges of the colors were.  It still ended up running all over, and the picture is a bit crooked because I didn't want to move it after the colors started running but now it is softer and probably more appropriate living room decor.