  |
| After Before |
I had this lamp in my bedroom, but when I decided to be an adult and get two bedside tables, I got matching lamps for them and moved this out to the living room. It originally had a silver base but that didn't go so I spray painted it with the same black matte spray paint that I used for my mason jars.
I wasn't sure what to do with the lampshade - the blue really didn't fit with my decor, but I had no ideas for how to update it. That is until I saw this fluer-de-lis printed burlap fabric at Joanne Fabrics. I wasn't looking for fabric for the lamp at the time, but when I saw this burlap I immediately knew I needed to find a way to incorporate it into my home.
Here's how I did it:
Step 2: Spray paint the base. I actually didn't sand or prime the base because I knew I wasn't going to be touching it much, and the matte spray feels like it sticks pretty well.

Step 3: Make a template. I used parchment paper and rolled the lampshade across the table to trace the shade to make a template for the fabric. I traced the bottom and the top - note: a rectangular piece of fabric wont work because of the curve in the shade.

Step 4: Pin the template to the fabric. I initially pinned it to the wrong side of the fabric, but then realized that I couldn't easily align the pattern that way. So I pinned it to the right side (with the printing). This is where having a transparent template really pays off because you can easily align the template on the pattern.
Step 4.5: (not pictured) Realize that because your fabric has a large pattern that can only go one way, cutting the whole template in on piece will end up with a really weird looking lamp. Decide to do three panels.
Step 5: Cut the fabric around the template. Note: you will want to leave room for errors. I cut the template out about an inch bigger on each side and then cut the fabric out bigger than that. I'd say I probably had about 2 extra inches, but in some places that was barely enough because of the way the pattern fell.

Step 6: Place the fabric on the shade to ensure it lines up well. I pinned the fabric to the shade so that I could play with it until I got it to look the way I wanted.

Step 7: Glue fabric to shade. I used hot glue (be careful: it's hot!!) and used folded up parchment paper (because it wouldn't stick to the glue) to press the fabric to the shade. I glued at the top and bottom, just folding the fabric over and gluing along the inside of the shade.
Step 8: Finishing touches. Even after playing with the fabric for (not even kidding) hours, I still didn't love the way the pattern matched up between the panels. So, I decided to glue jute twine along the edges to sort of buffer against any misalignment. (Bonus: if you do something like this, you don't have to be as careful when gluing the edges together.) Since I was going to have the twine accent running up and down the shade, I also decided to put it along the top and bottom. I doubled the thread over to make it cover more area and be more noticeable.
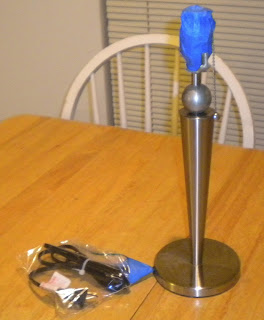
Step 1: Tape off where the light bulb goes and the cord so you don't spray them. I used a plastic bag to wrap the cord instead of wrapping the whole thing in tape.


Step 4: Pin the template to the fabric. I initially pinned it to the wrong side of the fabric, but then realized that I couldn't easily align the pattern that way. So I pinned it to the right side (with the printing). This is where having a transparent template really pays off because you can easily align the template on the pattern.
Step 4.5: (not pictured) Realize that because your fabric has a large pattern that can only go one way, cutting the whole template in on piece will end up with a really weird looking lamp. Decide to do three panels.
 |
| Pin the template to the fabric |
 |
| Align the template so the pattern looks good |

Step 6: Place the fabric on the shade to ensure it lines up well. I pinned the fabric to the shade so that I could play with it until I got it to look the way I wanted.
 |
| I tried to make the pattern match up between the panels as much as possible |

  |
| Finished! |
**I made an extra lamp (it's actually the one pictured) and it is for sale on Etsy, check it out!**
No comments:
Post a Comment