Sunday, June 9, 2013

Warning: Explicit Content - Mason Jars

Everyone is obsessed with mason jars lately.  Mostly I think the ideas are cute but - since I'm not planning a wedding any time soon - irrelevant.  I have to admit, I did jump on the bandwagon when I saw a mason jar which was spray painted with words embossed on the side (see: http://bit.ly/11OUBcg).  I instantly loved these but I really am not the type to have the word 'love' spelled out anywhere I live... that's about as likely as me throwing a tupperware party.

Cheeky Mason Jars

I gathered my supplies: three mason jars (I have no idea where three came from, that's just how many I bought), some puffy paint, and black matte spray paint.  I was all ready to go!  But then I couldn't settle on what to put on the jars.  Sure, they only cost a dollar or two, but I didn't want to mess them up.

At first I thought I would just put some symbols - I really like the ampersand (&). So I was thinking: # & @.  Unfortunately for me, I cannot draw at.all. so those simple symbols turned out to be overly ambitious.  So I put the project away and didn't come back to it for months.

By the time I got back around to this project, I was back in school for the semester and not too happy about it.  I'm not really a school person, and I'm pretty sure (judging from their content) that it was getting close to #finalz time, so I was extra angsty.  And I must have been listening to a lot of Drake and Rihanna.

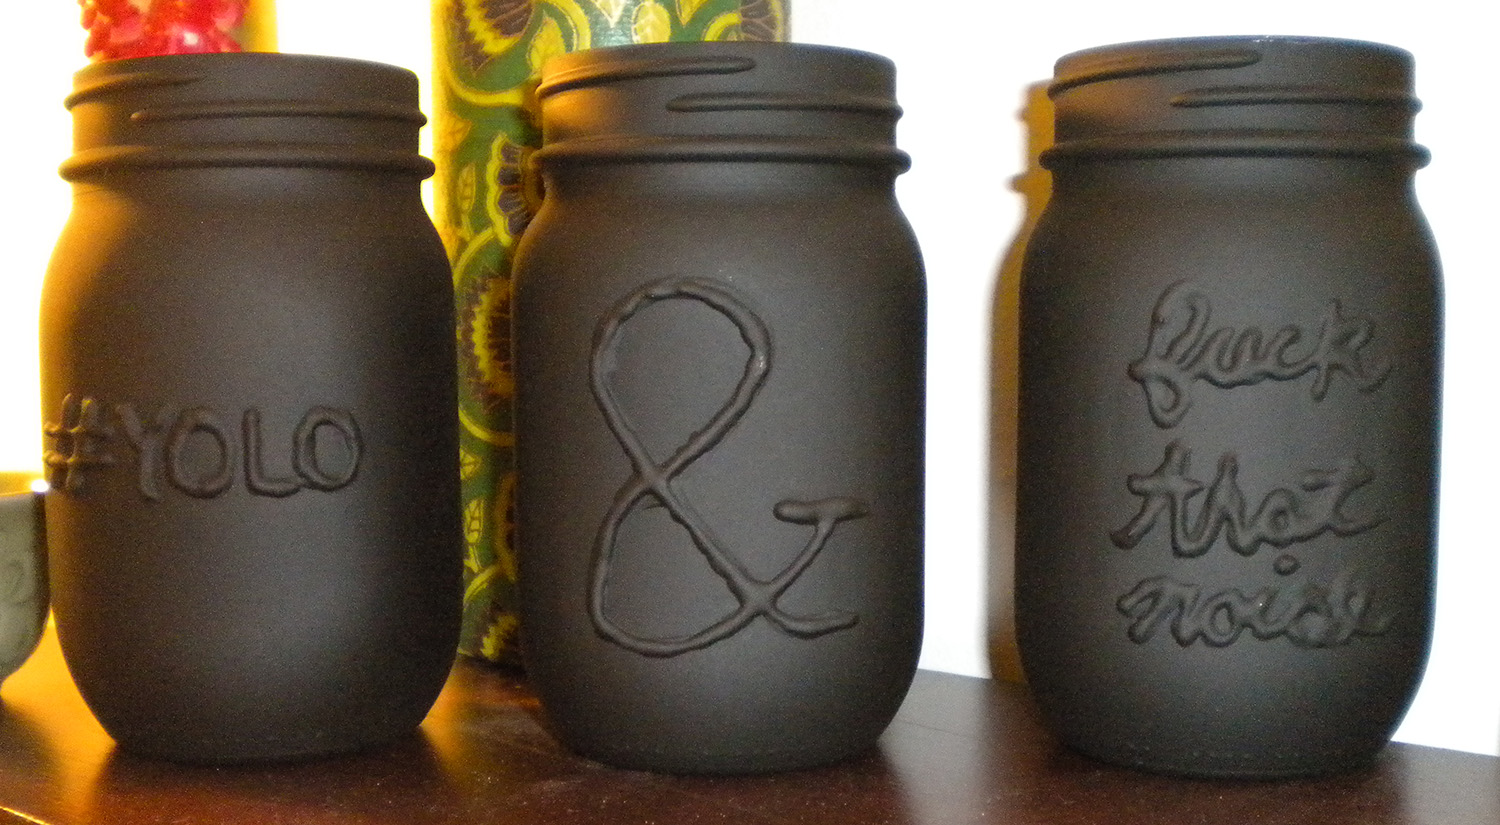
I settled on: f*** that noise, &, and #yolo.  The first is a lyric in a Rihanna song that I've always loved, to me it just says: "f*** the small and insignificant stuff" and/or "f*** what other people say."  People that know me think these are very fitting.  I love that they're explicit, but the black matte paint doesn't draw attention to them.  I also tried to soften the blow of the expletive by writing it in cursive.

Process: I drew on the jars with a marker that rubbed off until I got something I liked, then I went over it with puffy paint, then when that dried I spray painted it.
Mason Jars on my desk.  The black matte makes it hard to read what they say unless you're up close.

#mindblown - You Can Shop Online at Dollar Tree

First off, let me just say, I love the Dollar store.  Like, probably more than Macklemore loves thrift stores.  If it weren't for my complete lack of singing ability or training I would totally write a song about it.  I think the chorus would be something like: "Dollar Tree, thaz my jam" and it'd be set to the beat of "F**kin' Problems."

Getttting back to reality, I will pretty much use any excuse to go there and I always spend at least a half hour just browsing the aisles.  Sure, I inevitably spend $20 on things that I don't really need and will probably break, but there are some really great things there too.  In all honesty, I know I've bought a lot of stuff there over the past two years (I wasn't ever close to a Dollar Tree before), but I'm not sure what.

I love their glassware, I think my first project from the dollar store was when I filled a few of their square candle holder glasses with their decorating rocks and a small candle and those are now the decoration on my counter.  I also use some of their cleaning supplies, their version of the magic eraser is probably the cleaning supply I use the most out of all the ones I have.  It's great for getting stains off the counter and scuff marks off the walls.

OK, so now that I've gotten that out of the way, the real reason I'm writing:

You can buy things online at the Dollar Tree and have them shipped for free to your local store and pick them up!  I saw a sign about it when I was in the store browsing for crafting stuff (I think I went in to buy some of their candlestick holders to make tiered pedestals out of) and just had to look into it.

Most of the things you have to buy a bunch of, but they're still just a dollar.  So you're still spending like $12 for 12 candlesticks!  This might not make sense for everyone or every item (what would you do with 36 boxes of ziplock bags? or 36 travel mugs?) but if you need a bunch, why not just buy it online?

Online they have some really cute picture frames, and if you wanted to do a gallery wall, these would be perfect!  Plus, you'd know you were getting 24 of the exact same frame.  Here are a few of the ones I really like:

Silver Beaded 4x6 frame: http://bit.ly/102ue8w (this is $3/frame, min order: 6)
Silver Plastic Beveled 5x7 frame: http://bit.ly/ZCPm35 ($1, min order: 24)
Matted Triple Bevel 4x6 frame: http://bit.ly/19diPWE ($1, min order 24)

Also, they have some really cool craft ideas that show you what to use from their stores:
cupcake pedestals project: http://bit.ly/18Y8efr
tiered stand project: http://bit.ly/18Y8fjG

[oh, and no, I am not in any way affiliated with the Dollar Tree!]

Sunday, June 2, 2013

String Art

A few months ago I invited some friends over for a 'crafting brunch.' We'd been discussing it for a long time so I decided to make it happen.  We all chose different crafts to do, and brought our own supplies. It was a nice break from law school and we all walked away with something fun.

Closeups of my string art and a visual of the wall they're displayed on.

I settled on a string art project I'd seen on Pinterest (http://bit.ly/102wYTD).  I'm a huge fan of boats and I love the simple lines on these, but I thought I should start out with a little less ambitious of a ship design than in the tutorial.

All I needed was a canvas, some string and some glue (note: hot glue probably wouldn't be good for this because it dries so quickly and you might need to move some things around as you're working).

I ended up using two canvases I already had from when I moved into my apartment.  My mother always paints the walls in our houses 'musiln white,' which is really just pale yellow, so I'm not used to staring at white walls and I guess I was a bit overwhelmed by all the blank wall space (I was used to living in a tiny studio in NYC, so moving into a (GASP!) one-bedroom in Durham was a huge change).  I was so desperate to get things on the walls to break up all the white that I picked up these awful flower paintings at the local Goodwill and put them up until I could find something better.

The point is, I had these two matching canvases sitting around (because I did find something better). I was going to take them back to the Goodwill they came from, but I thought that not only would using them for this project be economical, but I'd really be doing the world a favor by getting rid of two tacky paintings.

Before: Tacky Flower Canvases

I pretty much followed the tutorial at the link above, except I used a cream colored yarn instead of string.  The hardest part was finding simple enough pictures to use as a template.  I ended up googling children's coloring book drawings because I figured those would have simple lines.  It still took awhile but I'm really happy with the finished products. 

I really want to make some more, but I'm already running out of space to put things and these are so simple I could see my apartment becoming overwhelmed by string art!  Maybe when I finish all the projects I've got in progress now I'll make some to give to friends or sell.